My Current Blogging Workflow: From Idea to Published in 48 Hours
Do you have a blogging workflow?
I do a familiar workflow myself to keep the blogging process very simple. For me, this allows me to focus more on writing quality content. This is especially important these days if you want your blog to succeed.
In this article, I’ll share my blogging workflow with you in case you need ideas on how to create one yourself or improve the workflow you already have.
Why I Have a Blogging Workflow (and why you should too!)
Before you see my blogging workflow, you might wonder why you need a blogging workflow at all.
It’s simple, really. A workflow will allow you to organize and strategize your blogging efforts. Then, you can focus on the actual writing, which is what matters the most, right?
Bloggers who don’t use a workflow will often miss deadlines, experience overwhelming burnout, run out of ideas, and post inconsistently.
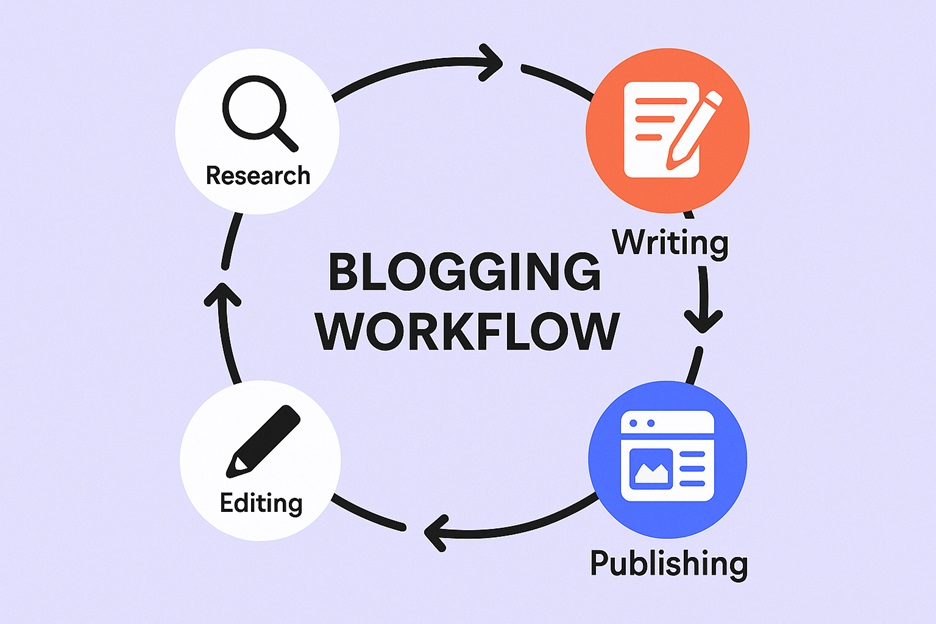
Creating a blogging workflow is really easy. You just need to create a simple plan, like the one I’ve outlined below, and start implementing it each time. Once you turn it into a habit, you’ll never even realize you’re doing it, but instead enjoy the benefits of being organized.
Step 1: Idea Generation and Content Calendar
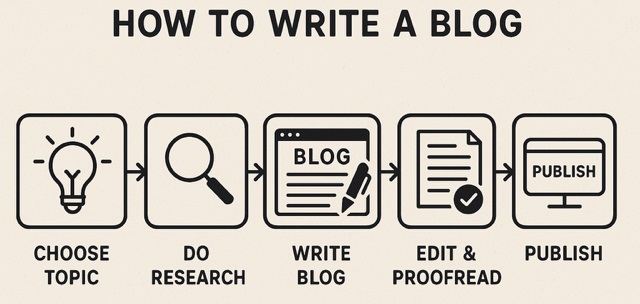
The first step of my blogging workflow is to generate ideas and add them to my content calendar.
Idea generation happens when you know and understand your target audience. This is because you understand their biggest needs, questions, worries, and pain points in your blogging niche. You’ll get your ideas from the topics they are asking about the most because that’s the type of blog content they will be willing to consume more of.
Once you gain new ideas for your blog, you’ll need to store them, and that’s where a content calendar comes into play. My content calendar is a simple spreadsheet that shows the idea’s title, SEO keywords, type of article format, due date, and I add “Publish” to mark it as complete. Each time I publish a post, I ensure that I add at least 3 to 5 additional ideas to the calendar, so I’m never running out anytime soon.
Idea generation and content calendar maintenance will ensure that you never experience writer’s block, run out of ideas, or become burned out because you’re always prepared to write your next blog post.
Step 2: Outline Creation
The next step in my blogging workflow is to create the outline for my next article, as listed on my content calendar.
To accomplish this, I take a few steps. I’ll research the top articles for the keyword and examine what they discuss in their content. Then I’ll write an article outline based on those topics to complete, but also outline gaps of information that they missed to keep my article unique.
I also asked ChatGPT Thinking to create an outline for my topic. I do this to see if the AI suggests any sections that I may have missed. It’s a great tool for helping you generate ideas to improve your post.
Once my outline is created, I’ll save it to my computer to work on later.
Step 3: Writing the Article
The next step of my blogging workflow is to actually write the article and fill in the blanks of my outline.
This is the most important step, in my opinion, so I ensure it counts by creating the most valuable and high-quality content possible. I also apply my search engine optimization techniques to the content in this step. I also ensure that I edit my post before moving on to the next step.
In this step of your blogging workflow, you should be spending more time working on your content than you would during any other step.
Step 4: Scheduling, Publishing, and Promoting
The final step of my blogging workflow involves releasing my new blog post into the world.
First, I’ll add the blog post to WordPress from the document where I wrote it. Then I’ll add images and formatting to it through the WordPress editor. After that, I’ll schedule it to post on the day that I want it to post.
Once it’s published, it’s time to promote the article. I usually promote it on the social media channels I work with for that particular blog. If the blog has a newsletter, I’ll make sure to include it in the next newsletter issues to increase exposure and attract more readers.
After that, I make sure to link to the blog post in future blog posts because interlinking is the best way to ensure evergreen content can actually remain evergreen.
Final Thoughts About a Blogging Workflow
My blogging workflow is fairly simple because the easier it is, the easier it is to form a habit, allowing you to focus on the most important things.
Remember – create a workflow to simplify the blogging process. You still have to write the best content you can write, but the rest deserves to be really easy, right? Try a workflow, modify it when needed, and then enjoy better organization and less burnout.
If you’ve enjoyed this article, consider supporting me for writing it by giving me a small one-time donation.
I’d also like to invite you to join my free discussion forum, all about running your own online community and blog.
About the Author
Shawn Gossman has created content, blogged, ran online communities, and shared a passion for digital marketing for over twenty years. Shawn believes the best way to help content creators, businesses, brands, and marketers is to give away more than you sell. The same advice is recommended for the readers who follow this blog. Shawn also offers various services for extra help in content creation and blogging.
Grow your online brand with exclusive tips from me sent right to your inbox!


